#claude-code

5 posts

Visual Editing: The Admin Experience I've Always Wanted

Prototyping a visual editor for a client project and finally seeing an admin experience I've dreamed about come together.

I’m working on a website redesign for Quality Time, a design agency, and one of the things I’ve been prototyping is a visual editor admin experience.

This is the kind of admin experience I’ve always wanted to build. Click on an element, edit it inline, see changes in real-time in the actual context of the page. No switching between a clunky CMS form and a preview tab. Just… edit where you’re looking.

Not sure if this will make it into the final version—there are always tradeoffs between what’s cool to prototype and what makes sense to ship and maintain. But it’s been fun seeing it come together.

Another Claude Code win.

Claude Code Interactive Prompts

From delightful discovery to curious about balance—all in one session

I was using Claude Code this morning and asked it to suggest a few repository names. Instead of just listing them in text, it gave me this:

Claude Code interactive prompt showing repository name options with descriptions

An interactive prompt! Right in the terminal, with numbered options, descriptions, and keyboard navigation instructions.

This is such thoughtful UX for a CLI tool. It makes the interaction feel polished and actually fun to use. Small touches like this make all the difference.

And Then It Happened Again

But here’s where it gets interesting. Ten minutes later, while working on this very blog post, I told Claude to add the screenshot to the post. And instead of just doing it, Claude prompted me again:

Claude Code asking whether to include the screenshot in the blog post

Same feature, same delightful UI—but this time asking if I wanted to include the image in the post.

Wait. I just asked you to include the image. Why are you asking me if I want to include the image?

My reaction was completely different. Not “wow, this is cool!” but “this feels redundant and kind of weird.”

Finding the Balance

It’s fascinating how quickly a feature can go from delightful discovery to potential friction. The first time felt like a pleasant surprise. The second time felt… redundant.

And maybe that’s the key difference: the first prompt was asking for new input I hadn’t given. The second was asking me to confirm something I’d already explicitly requested. That’s not helpful interactivity—that’s friction.

This isn’t a criticism—it’s just an interesting UX challenge. When do you prompt for input versus making a smart default? And more importantly, when should you skip the prompt entirely because the user already told you what to do?

I don’t know the answer. Maybe the first prompt (choosing repo names) deserved the interactive treatment because it’s genuinely hard to auto-select from multiple good options. But the second one? If I say “add the image,” maybe just… add the image.

Or maybe I just need more time with the feature to appreciate when it shows up.

(Oh, and one more thing: the “Type something” option doesn’t support vim keybindings, so hitting Esc cancels the entire prompt instead of exiting insert mode. That’s… particularly annoying for vim users.)

Actually, I just hit an even more frustrating issue. Or did I? I was mid-sentence in one buffer when my interactions with Claude completely stopped—not crashed, just unresponsive. Turns out there was an interactive prompt waiting in another buffer, and it was blocking all interactions everywhere until I answered it.

That’s a real problem for multi-buffer workflows. But here’s the thing: I can’t replicate it now. Maybe it was a bug, maybe I’m misremembering. Live blogging/QAing, I guess!

Either way, it’ll be interesting to see where Anthropic lands on this balance. Too few prompts and you miss chances for user input. Too many and you’re breaking flow.

For now, I’m still impressed by the execution even if I’m curious about the strategy.

He's Going the Distance: Making a Minecraft Difficulty Scaling Mod

What happens when you make a Minecraft mod where the game gets harder the farther you travel from spawn? Zombies. So many zombies. A quick dev journal about building a distance-based difficulty scaler and discovering it's secretly a co-op game.

The Song That Launched a Mod

I was coding when “The Distance” by Cake came on. You know the one—“He’s going the distance, he’s going for speed…”

And I thought: what if that was a Minecraft mod? What if the farther you traveled from spawn, the harder the game got? Not just a little harder. Exponentially, absurdly, ridiculously harder.

So I made it. And I called it “He’s Going the Distance” because sometimes the best project names come from whatever song happens to be playing.

The Build: Standing on the Shoulders of Mutualisms

This mod came together fast. Way faster than my previous Minecraft mod about ecological partnerships.

Why? Two reasons:

1. I’d already learned Minecraft’s core systems. The mutualism mod taught me how Fabric works, how game mechanics layer together, how to think about mob behaviors and world generation. That knowledge transferred directly.

2. This mod is conceptually simpler. No custom mobs. No new blocks or items. No complex ecological relationships. Just one core mechanic: distance from spawn affects difficulty.

The implementation touches everything—mob health, spawn rates, damage scaling, the works—but it’s all variations on a single idea. And once again, Claude Code made it possible. What would have taken me weeks (or months) of researching Minecraft’s difficulty systems happened in a few focused sessions.

The QA Session: Boats, Zombies, and Beautiful Chaos

Here’s where it got fun.

A friend was staying over, and I recruited them for playtesting. We loaded up the mod, spawned into the world, and started exploring.

At first, everything seemed normal. Minecraft as usual. But as we traveled farther from spawn—building our way across oceans in boats—the game started to reveal its teeth.

Then we got far enough.

Zombies started spawning on our boats. Not near us. Not in the water. Literally materializing on the boat we were riding.

We died. A lot.

But here’s the thing: we were laughing the entire time. The absurdity of the escalating difficulty, the chaos of trying to navigate while zombies spawn-killed us—it was exactly the kind of ridiculous gameplay moment I’d hoped for.

The Design Evolution: Accidentally Making a Co-op Mod

Testing with another person revealed something I hadn’t anticipated: this isn’t really a single-player mod.

Playing solo, the difficulty curve felt punishing. Too steep. You’d venture out, get overwhelmed, die, and feel frustrated.

Playing co-op? Perfect. The escalating challenge felt like an adventure you were tackling together. The difficulty became a shared obstacle instead of a personal failure.

So I adjusted the scaling. Made it more gradual. Tweaked it shorter and shorter until we found the sweet spot—a difficulty curve that ramped up just fast enough to feel exciting with a partner, but not so fast that it became frustrating.

The mod became tuned for two players almost by accident. And honestly? That’s way more interesting than what I originally envisioned.

What I Learned: Different Kinds of Fun

Building this mod taught me something about my own creative process.

I love both types of modding:

  • Content mods (like the mutualism mod): Adding new things to the world—mobs, blocks, mechanics, ecological relationships
  • Gameplay mods (like this one): Tweaking how existing systems work to create new experiences

They scratch different creative itches. Content mods are about world-building and narrative. Gameplay mods are about systems design and balancing.

Right now, I’m enjoying exploring both. Trying different ideas, building quick prototypes, seeing what sticks. I’m not trying to commit to one massive mod project—I’m experimenting until I find something I want to spend serious time on.

And that feels right. This whole return to Minecraft modding isn’t about building the perfect mod. It’s about rediscovering why I fell in love with game development in the first place.

The Technical Bit: What Actually Changes

For those curious about implementation, here’s what scales with distance from spawn:

  • Mob health: Farther enemies are tougher to kill
  • Mob spawn rates: More hostiles appear as you explore
  • Mob damage: Hits hurt more the farther you are
  • Everything else I could think of: The mod touches pretty much every difficulty parameter Minecraft exposes

The scaling is gradual now (thanks to playtesting), but venture far enough and you’ll absolutely notice the difference.

What’s Next

For now, the mod is “done.” Not done-done—there’s always more tuning, more features, more polish. But done enough that I’m happy with it.

I’ll probably play it with more people, see how it holds up with different group sizes, maybe discover new breaking points or hilarious failure modes.

Eventually I might come back and expand it. Add configuration options for the scaling curve. Implement different difficulty profiles. Who knows.

But right now? I’m ready to start the next experiment. Another mod idea, another gameplay concept, another song-inspired project name.

Reflections: Speed Running Creative Ideas

What strikes me most about this project is the velocity.

Idea → working prototype → playtested → tuned → “shipped” in a timeframe that would have been impossible for me even a year ago. Not because I’m a better programmer (though I am learning), but because the tools have changed.

Claude Code didn’t write this mod for me. It helped me build it. There’s a difference. I still made every design decision, tuned every parameter, playtested every iteration. But I didn’t have to spend days hunting through Minecraft’s source code or deciphering outdated modding tutorials.

It’s the same creative flow I found with the mutualism mod, just applied to a different kind of project. And I’m starting to realize: this is how I want to make things. Fast iteration, rapid prototyping, shipping ideas before they have time to get stale.

He’s going the distance. He’s going for speed.

Turns out that song was more appropriate than I thought.

Full Circle: From Java Tutorials to Vibe Coding a Minecraft Mutualism Mod

After years away, I'm back to where I started: making Minecraft mods. This time with Claude Code, a book about ecological partnerships, and a few hours of pure creative flow.

Where It Started

I got into programming because of Minecraft.

I went to art school, not CS. In high school, there was a comp sci teacher—when I asked if I could join his class (even while helping one of his students with their homework), he said my grades were too bad. No bootcamp either. Just me, YouTube, and a lot of Buckey’s Java tutorials. I learned just enough to make some custom blocks, items, and armor.

After all these years—after professional development work, web apps, CMS projects, everything—I’m back. And it feels awesome.

The Spark: A Book About Partnerships

I’ve been reading “The Call of the Honeyguide” by Rob Dunn, and it’s been a real inspiration recently. The book is about mutualisms—the reciprocal relationships between species where everyone benefits.

The title comes from a partnership in nature: In sub-Saharan Africa, the greater honeyguide bird has evolved a specific call—used only to attract humans. The bird leads people to beehives because it wants the wax inside, but it can’t access the hive on its own. Humans get honey, the bird gets wax. Everyone wins.

I’ve been experimenting with clay and ceramics lately, trying to find a way to combine that with the ideas from this book—but I haven’t found a compelling idea yet. About Minecraft, both wanting to play it and rethink about making mods, the two ideas just overlapped perfectly. So I went for it.

The Vibe Code Session

Here’s the wild part: I went from idea to working prototype in just a few hours.

How? Claude Code and pure creative flow—vibe coding. But don’t get me wrong, there was planning. Claude and I sat down and talked through different types of mutualisms before we even discussed turning it into a Minecraft mod. The planning and architecture documents were all part of the vibe coding process.

The experience was insane. I haven’t touched Minecraft modding in years, and getting up to speed with the modern Fabric toolchain and current Java practices would have taken me 2-3 years of learning. But in just one night, Claude helped me navigate it all—the development environment, the game mechanics, everything. It felt like pair programming with someone who had infinite patience for my “what if we tried this?” ideas.

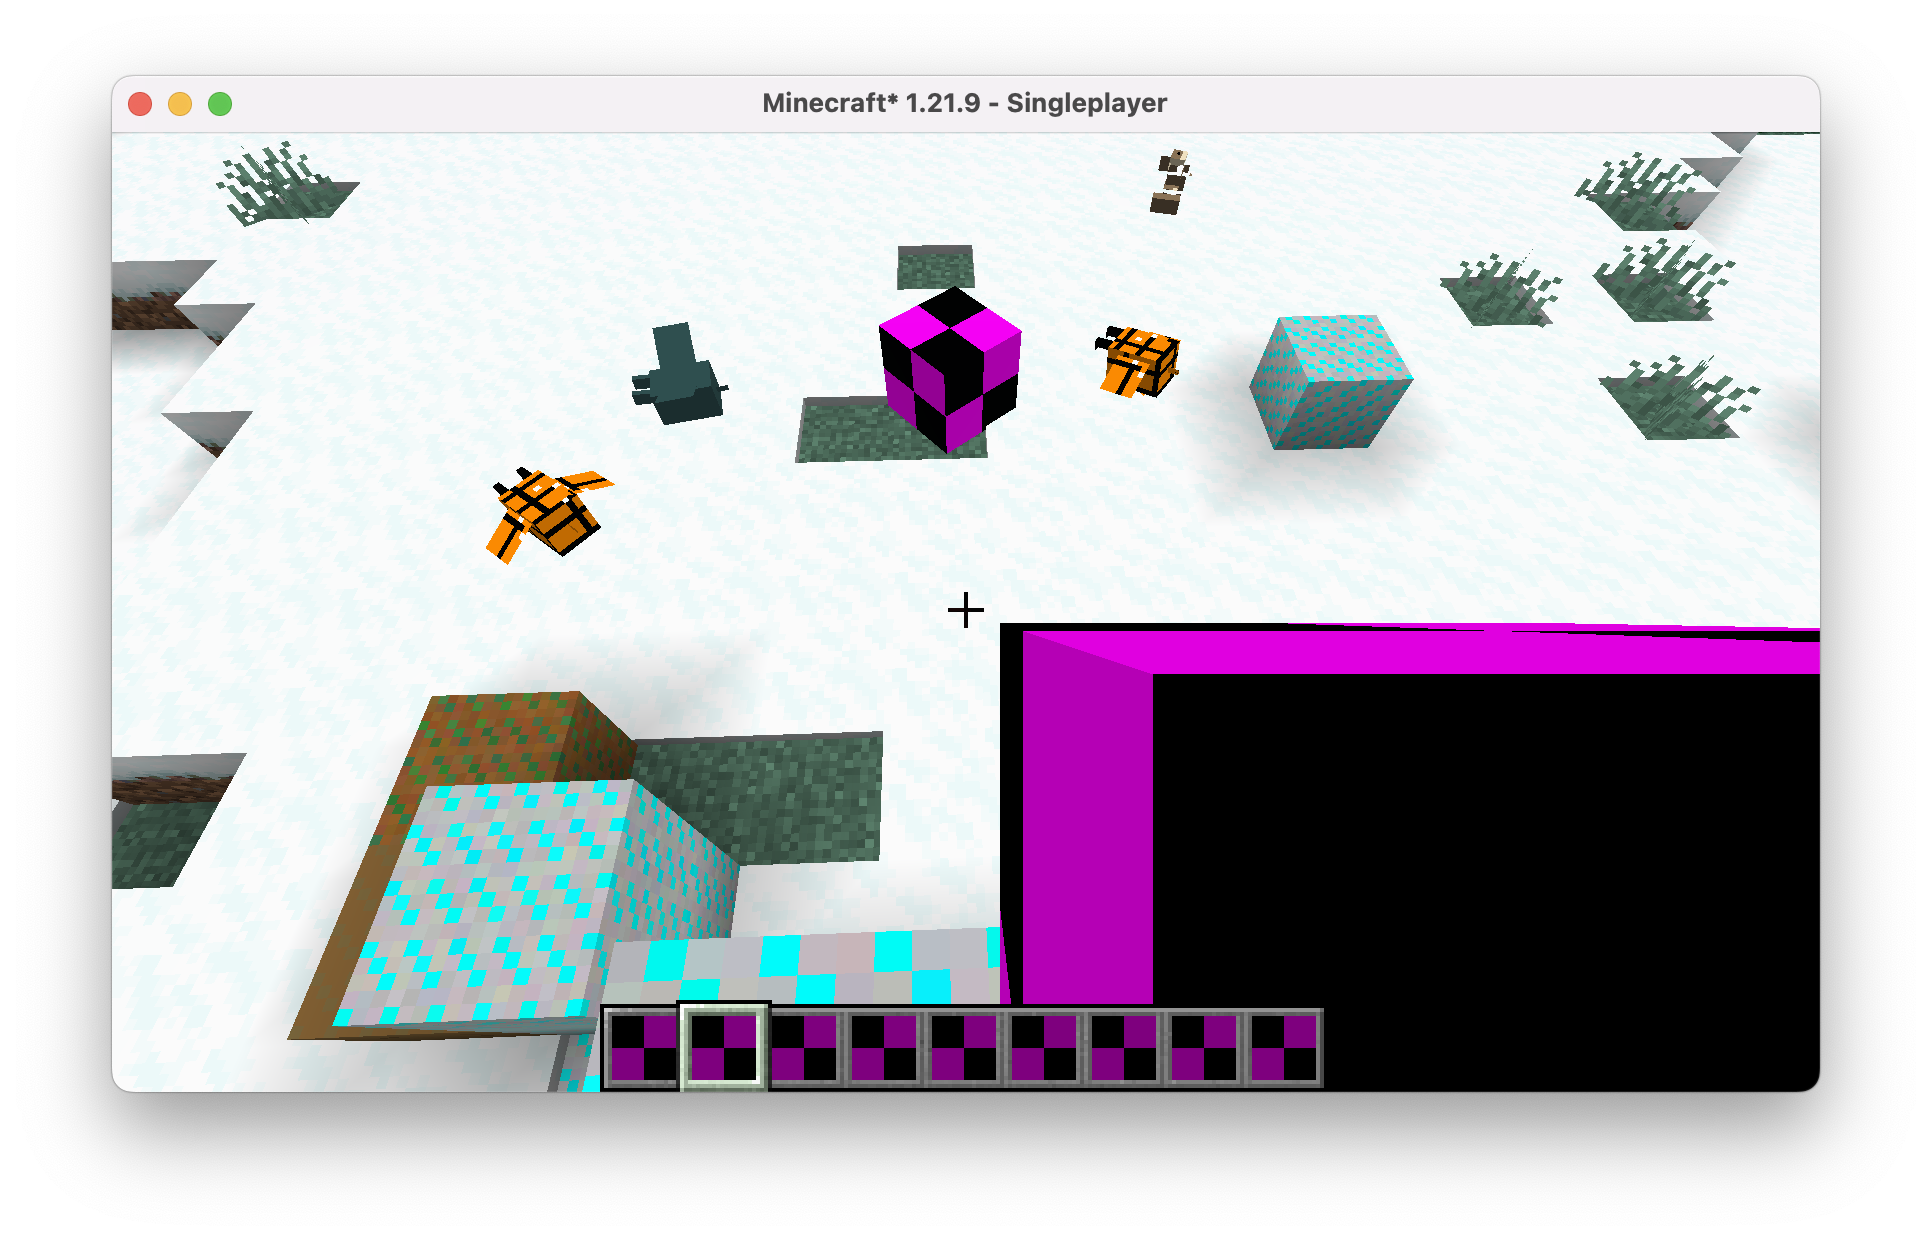
The Assets: Textures and Models

Here’s something I didn’t expect: Claude Desktop also generated all the visual assets.

Block textures, item sprites, mob models—everything. I just gave it technical requirements: “16x16 pixels, PNG format, filename should be honeyguide_egg.png” and it would spit out pixel art. No style direction, no references, no iterations. Just worked first try.

Are they amazing? No. They’re fine. Functional placeholders that get the job done. The kind of thing I’d normally spend hours hunting through asset packs or attempting (badly) in a pixel art editor. But for rapid prototyping? Perfect. I can see them getting better with more iteration or if I spent time refining the prompts, but honestly, I didn’t need to.

The fact that I could go from “I need a yucca moth sprite” to having one in my inventory system in minutes meant I never lost momentum. No context switching to art tools, no breaking flow to find temporary assets. Just describe what I needed and keep building.

All the custom blocks, items, and mobs in the Symbiotic Survival creative inventory

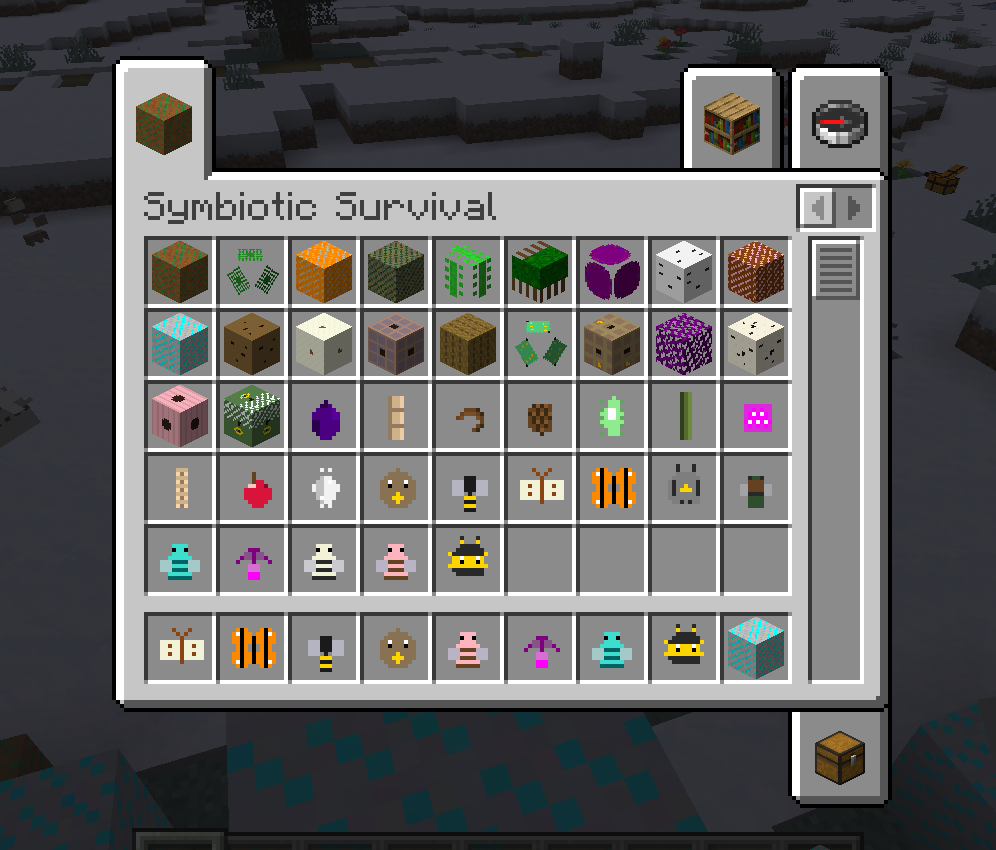
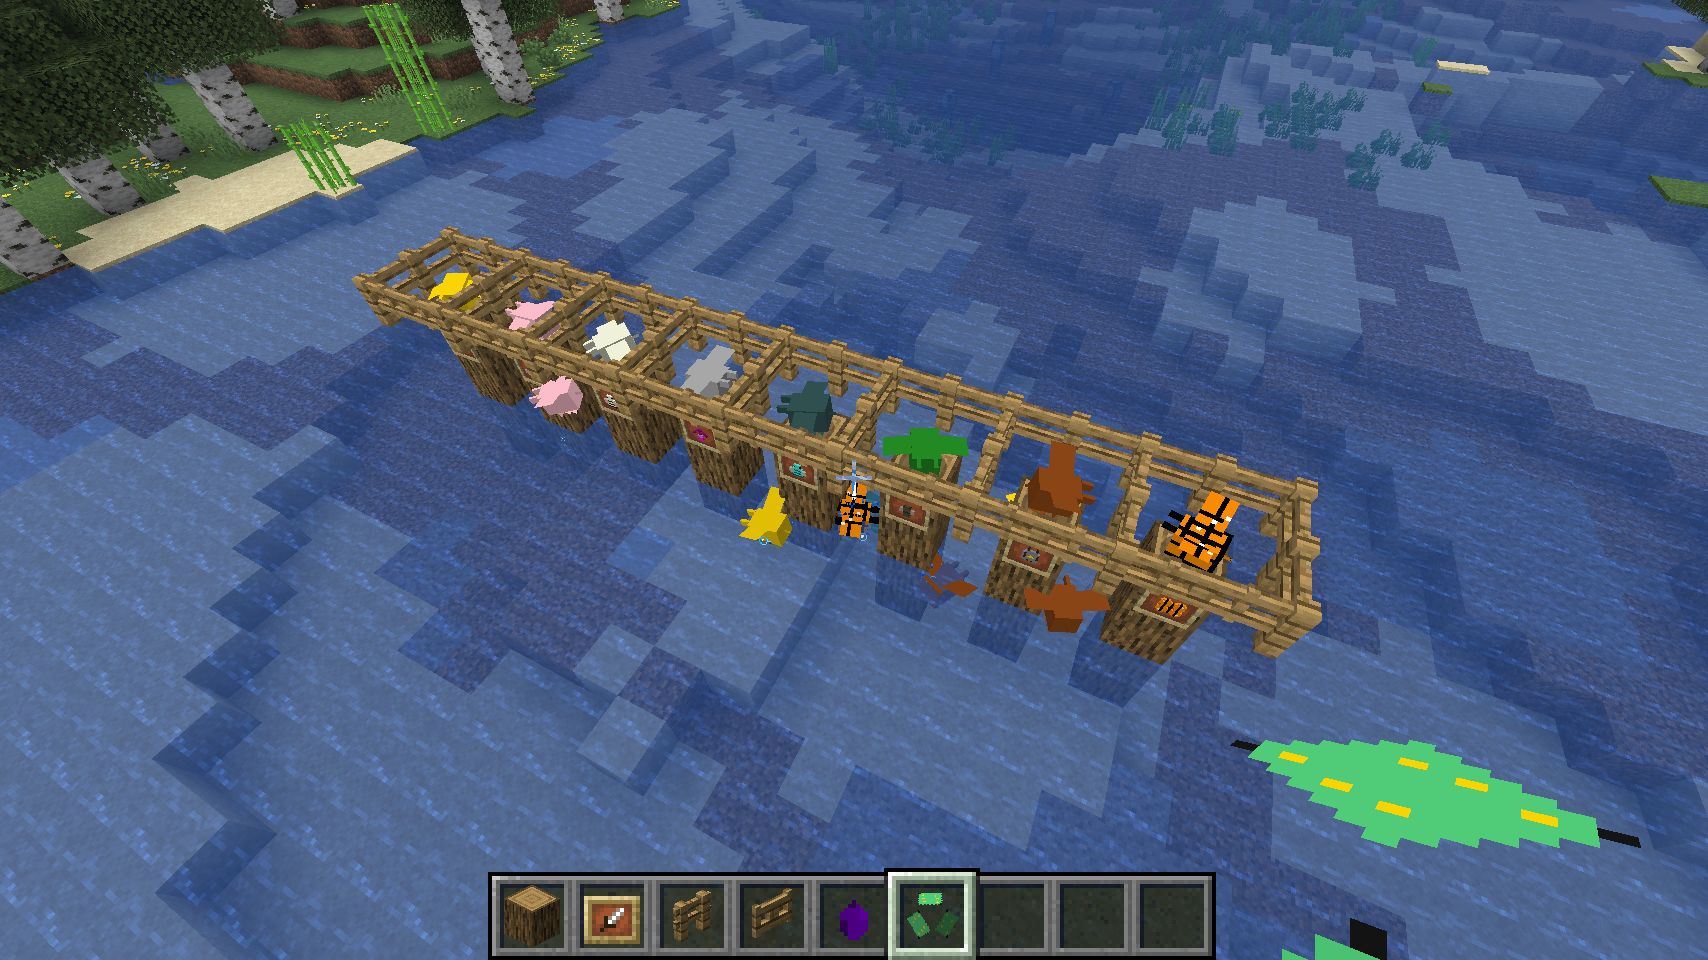
What We Built: Symbiotic Survival

The mod is called Symbiotic Survival, and it’s about teaching players that understanding and preserving natural partnerships is more rewarding than exploitation.

The Honeyguide

The star of the show—these birds lead players to bee nests, just like their real-world counterparts. But here’s where it gets interesting for game design:

You don’t learn this through a tutorial. You learn it by watching.

Bee keeper villagers interact with honeyguides naturally. You see them following the bird, harvesting honey, and sharing larvae as a reward. The honeyguide remembers this positive interaction.

Then you see a pillager encounter a honeyguide. The bird tries to lead them to honey, but they just attack it. No honey, no understanding, no mutualism.

Players learn the mechanic through emergent storytelling, not UI pop-ups.

Biome-Specific Mutualists

Each biome has its own pollinator-plant partnership:

  • Fig wasps in jungle biomes
  • Yucca moths in desert regions
  • And eight more unique pairs across the world

Here’s the core mechanic that makes it work: Destroy the pollinator’s home (nest, hive, etc.), and the nearby tree stops producing fruit.

Want sustainable resources? Preserve the partnership. It’s ecology 101 through gameplay consequences.

Custom mutualism tree towering over the forest

What This Taught Me About Game Design

Building this reminded me why games are such powerful teaching tools. Nobody wants to read a textbook about fig wasps and their obligate mutualism with fig trees. But make it a game mechanic where destroying the wasp nest means no more figs? Suddenly players care about fig wasps.

The villager and pillager interactions added another digestible layer to the game. Players can learn by watching NPCs interact with the honeyguide, seeing the difference between cooperation and conflict play out organically.

Unexpected Discovery: How Claude Codes Differently for Games

Here’s something I didn’t expect: Claude Code approaches game development completely differently than web development.

In all my web projects—portfolio sites, CMS work, API development—Claude tends to go straight to production-ready code. Clean, complete implementations. When it says something is “done,” it’s done.

But with Minecraft modding? It’s working in a fundamentally different mode.

The Incremental Approach

Claude’s strategy for this mod has been relentlessly incremental:

  • Make sure a single block loads before worrying about the whole tree system
  • Get items rendering properly before even touching mob spawning logic
  • Test one mechanic in isolation before building the next layer

At first I thought this was just being cautious. But then I realized: it’s actually the right approach for game development. Game mechanics need to be felt and tested iteratively in ways that web features don’t.

The TODO Philosophy

Here’s where it gets interesting: Claude leaves TODOs everywhere.

// TODO: Implement proper particle effects for pollination
// TODO: Add sound effects for honeyguide calls
// TODO: Optimize tree search algorithm for large forests

And then it marks the feature as “completed.”

My web dev brain initially rebelled at this. “That’s not done! There are TODOs!” But for rapid prototyping? This is actually ideal. The core mechanic works. The polish can come later. Claude’s definition of “completion” in this context means “working prototype, next chunk unlocked.”

I definitely prefer this for the creative exploration phase—but it requires vigilance. You need to know the difference between “works well enough to test the next idea” and “actually production ready.”

The Refactoring Moment

The tradeoff hit me when I discovered leaves were withering away even though they were attached to wood blocks.

Bug, right? Turns out: not exactly.

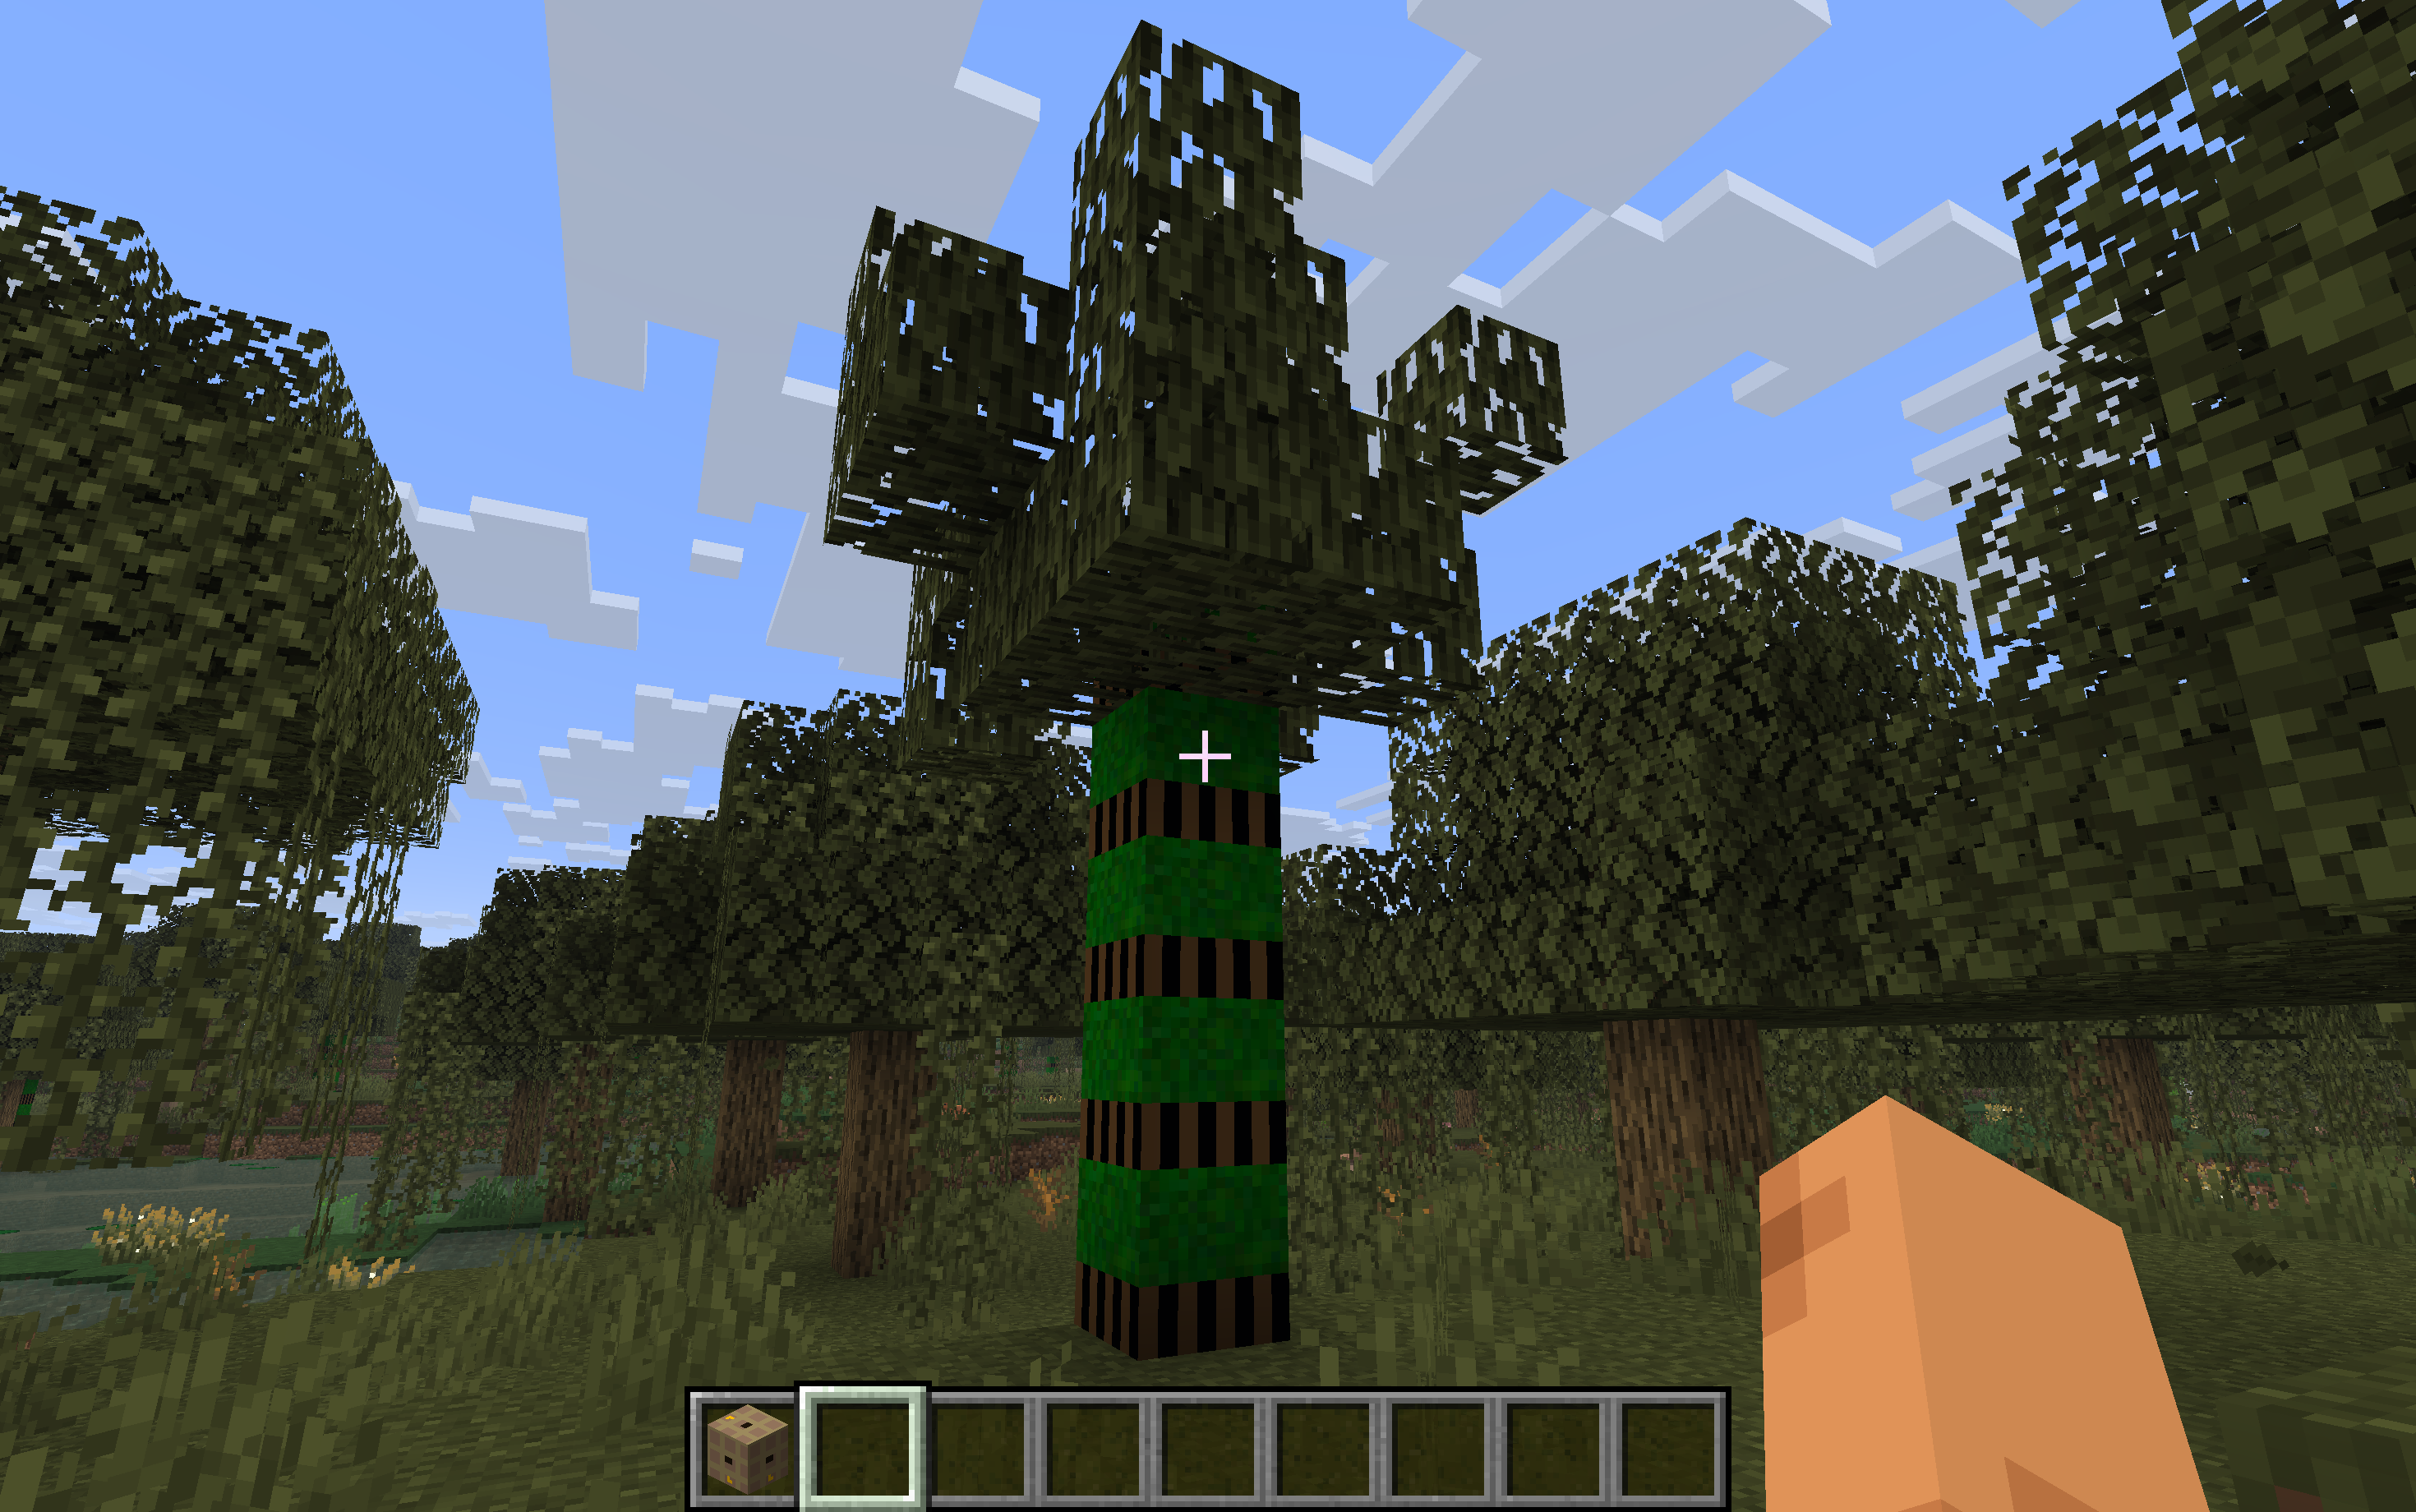
Through investigation, I found that Claude had set up our custom blocks using generic Minecraft block models—enough to get them rendering and testable, but not properly inheriting from the specialized PillarBlock and LeavesBlock classes they needed.

It was intentionally halfway. Test first, refactor to spec later.

So I spent time refactoring tree blocks to properly extend PillarBlock, leaves to inherit from LeavesBlock, getting all the proper behaviors instead of generic placeholders. Not hard, but something I hadn’t expected to do after Claude said the blocks were “working.”

Different Domains, Different Workflows

What I’m learning: this placeholder-heavy, chunk-at-a-time approach actually makes sense for game development in a way it doesn’t for web.

With web apps, you generally want components to be production-ready before you build the next layer on top. But with game mechanics, you need to play with rough implementations to know if they’re even fun before you polish them.

The honeyguide’s pathfinding didn’t need to be perfect to test whether the “follow the bird” mechanic was engaging. The tree-pollinator relationship didn’t need optimized neighbor-searching algorithms to validate that “destroy nest → no fruit” was the right game feel.

Claude seems to understand this implicitly. Or maybe game development just naturally encourages this workflow, and Claude adapts to it.

Either way: if you’re using Claude Code for game development, embrace the TODOs. Embrace the placeholders. They’re not tech debt—they’re creative scaffolding.

Just remember to come back and actually implement them eventually.
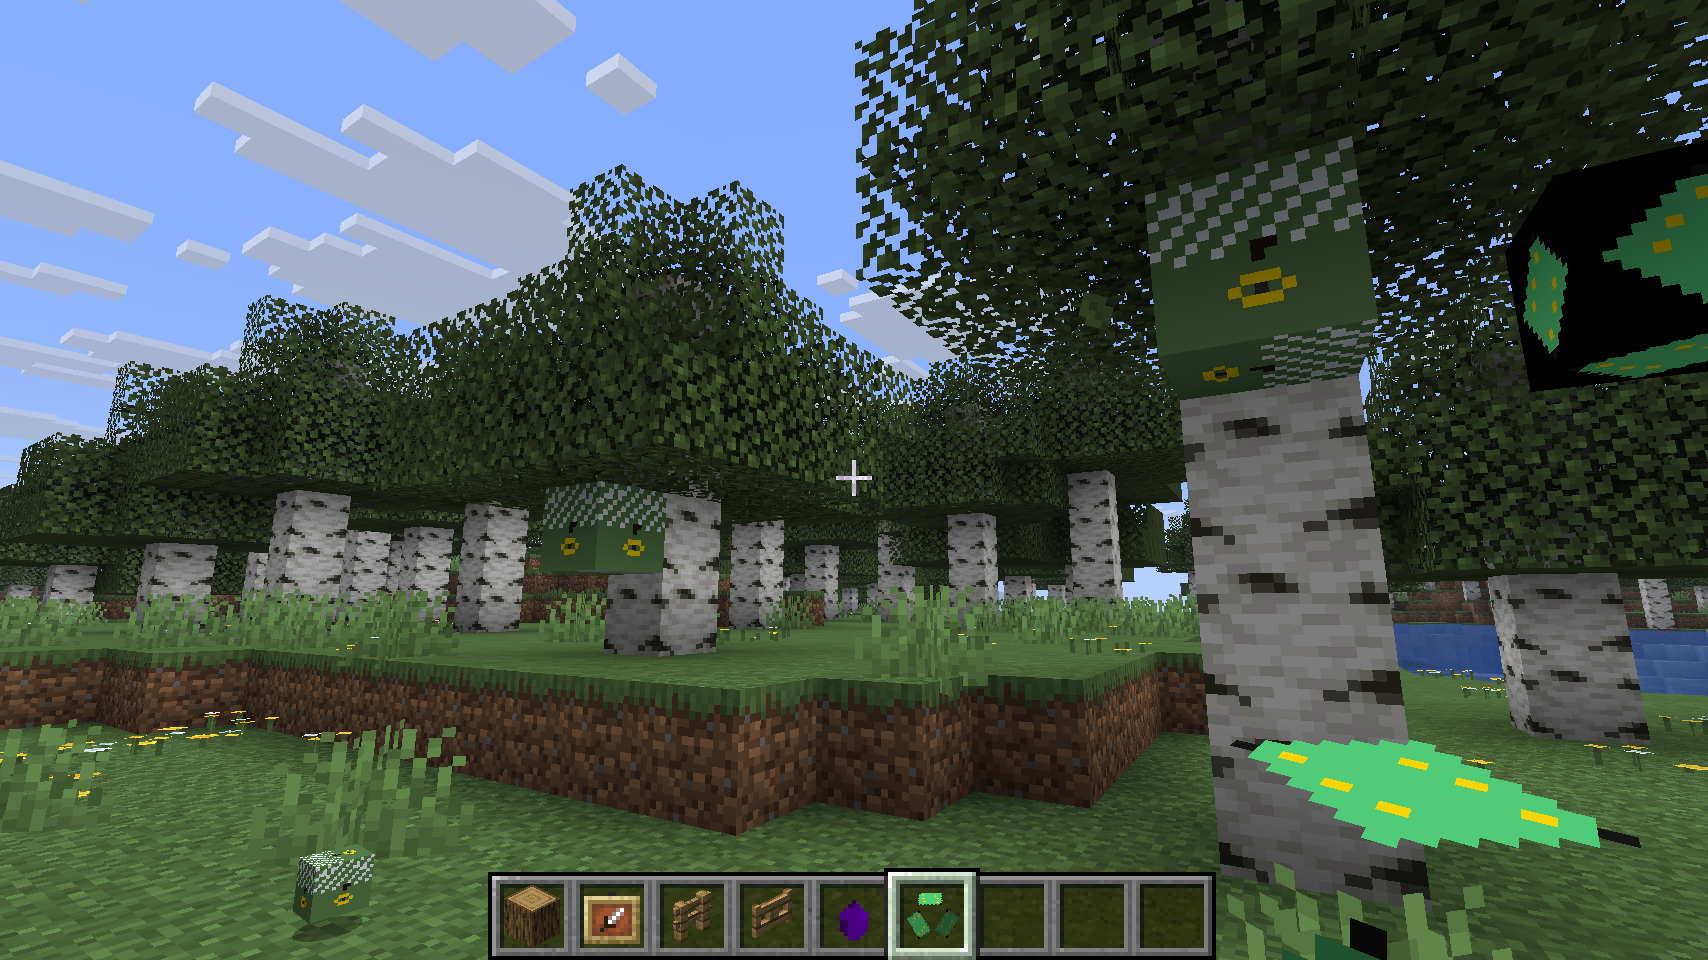
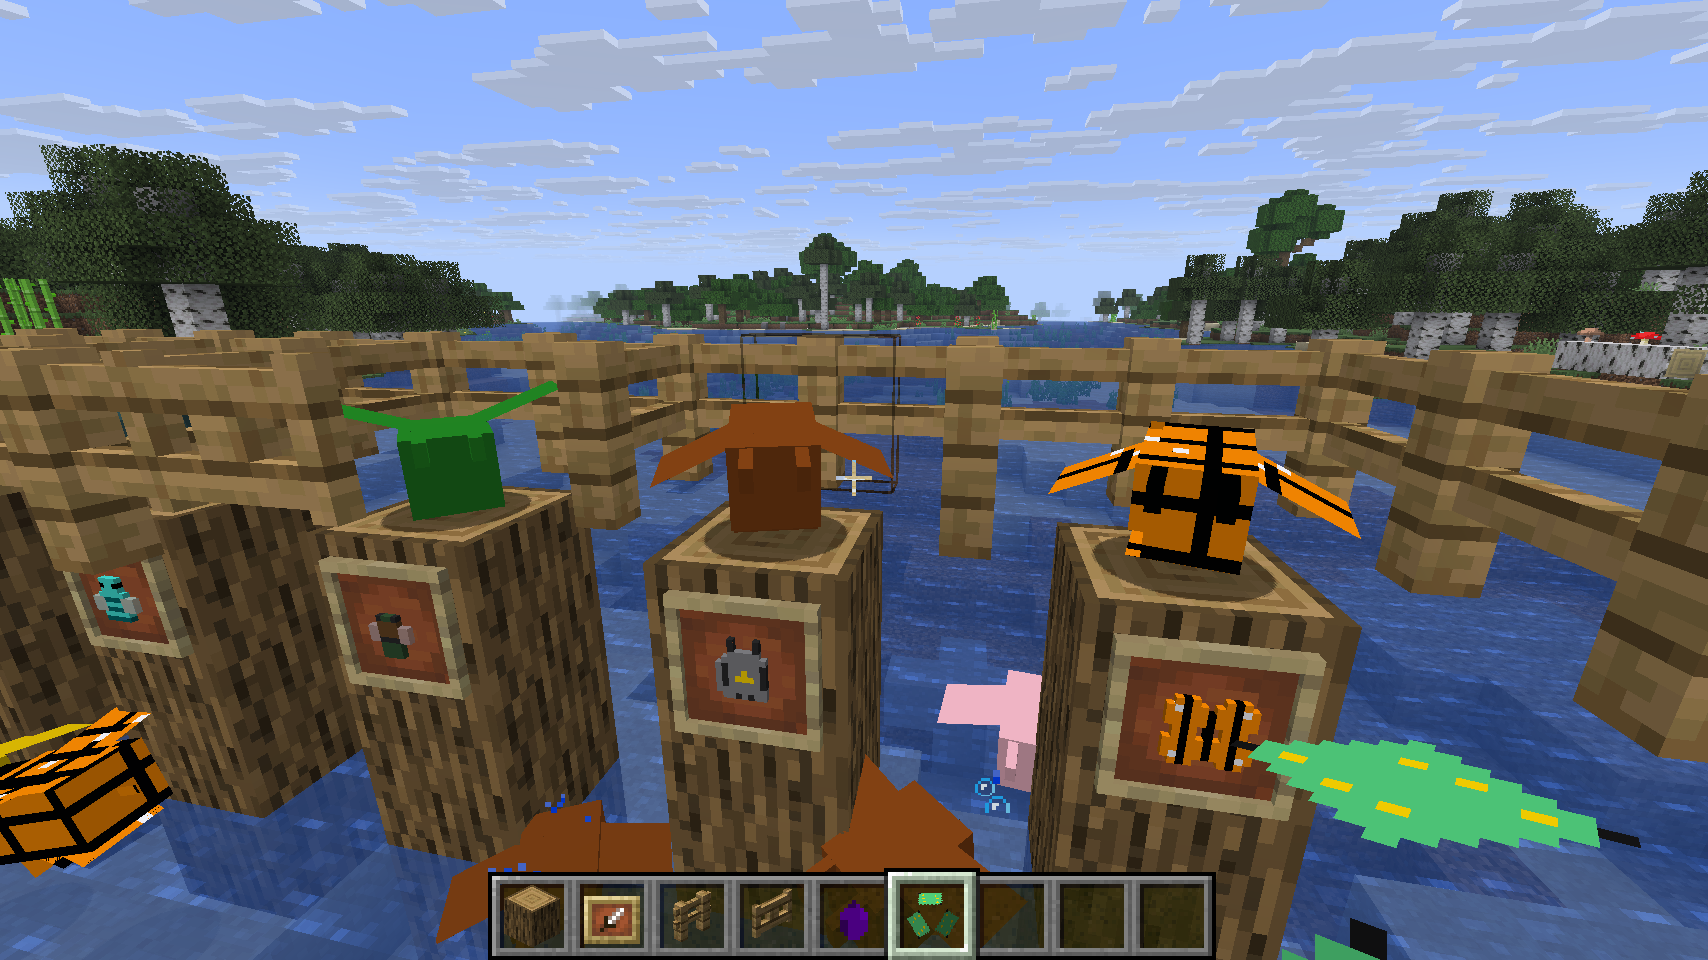
More Screenshots

Landscape showing custom trees alongside vanilla Minecraft biomes Biome-specific pollinators on their hive blocks
Different pollinator species with their hive blocks Custom mutualism trees and blocks in the Minecraft world

What’s Next

Right now, it’s a prototype. The honeyguide works, the basic pollination mechanics are in, and the emergent villager behavior is chef’s kiss. But there’s so much more I want to add:

  • More complex mutualism chains: What if trees that depend on bird pollinators also provide fruit that feeds those birds? Break the chain anywhere and everything suffers.
  • Seasonal behaviors: Migration patterns, seasonal blooms, hibernation cycles
  • Player education mechanics: Maybe an in-game journal that fills in with observations, like Breath of the Wild’s Hyrule Compendium
  • Consequences for restoration: If you’ve damaged an ecosystem, can you restore the mutualism? What does that look like mechanically?

But honestly? Even if I just polish what exists now, I’m proud of it. It’s a full circle moment—returning to where I started as a developer, but with years of experience and new tools that let me build in hours what would have taken weeks before.

Building a Quick Board Game Helper with Claude Code

A 30-minute prototype to solve the handwriting problem in a party game.

My brother and I were playing an old board game with some friends the other night. The core mechanic is simple: everyone writes an answer on a piece of paper, then the person who’s “it” tries to guess which answer belongs to which player. It’s the kind of game that’s been around forever, and it’s fun because you’re trying to write something that sounds like someone else, or throw people off your trail.

The problem? Handwriting.

After a few rounds, everyone starts recognizing each other’s handwriting. My brother’s chicken scratch, my all-caps habit, a friend’s distinctive cursive - it doesn’t take long before you’re not really guessing based on the content anymore.

The Workarounds

My brother came up with a few solutions on the spot. We could use a shared Google Doc where everyone types their answer in a numbered slot. Or Google Slides, where each person adds to a different slide. Both work, but they’re a bit clunky - you’re passing a laptop around, or dealing with everyone typing at once, and there’s no good way to do the reveal.

That’s when I figured I could probably just build something quick.

30 Minutes Later

I opened Claude Code and described what I needed: a simple web app where players connect from their phones, submit their answers privately, and then the host can reveal the answers one by one to guess who wrote what. After the guessing, they can reveal the actual matches.

It took about 30 minutes to get a working prototype. Nothing fancy - just the core loop:

  1. Host creates a game, gets a code to share
  2. Players join on their phones and enter their name
  3. Everyone submits their answer
  4. Host sees all the answers (anonymized) and guesses
  5. Reveal who actually wrote what

That was it. We used it for the rest of the night and it worked fine.

Learning Along the Way

One thing I’ve noticed with using AI coding tools is how they lower the friction for trying new things. I’d never used Railway before this - it was just the first hosting option Claude suggested that seemed reasonable for a quick websocket app. I’m familiar with websockets conceptually, but I hadn’t actually built something with them in this particular way. Neither of those things slowed me down much because I wasn’t learning them in isolation; I was learning them while solving a specific problem.

That’s the part I find useful. Not that AI wrote the code for me, but that the gap between “I think I could build this” and actually having something working is shorter now.

That’s It

I was pretty confident going in that I could pull this off with Claude Code, and it worked out. Not a groundbreaking moment, just a practical one. We played the game, the app did its job, and nobody could guess based on handwriting anymore.